Sunday, February 2, 2025

Craft Your Own Lamp with These Woodworking Plans

,

Crafting a Bespoke Wooden Lamp: A Comprehensive Guide

This document provides a detailed guide to constructing a handcrafted wooden lamp, encompassing all stages from initial design considerations to final assembly and finishing. The project requires intermediate woodworking skills and familiarity with basic electrical wiring. Safety precautions are paramount throughout the process and should be strictly adhered to at all times.

Phase 1: Design and Material Selection

Defining the Lamp's Aesthetic

Before commencing the construction, a thorough design process is crucial. Consider the overall style you wish to achieve. Will it be a minimalist, modern lamp, or a more rustic, traditional design? The size and shape of the lamp base, the height of the lampshade holder, and the overall proportions should be carefully planned. Sketching multiple designs and exploring various configurations will aid in refining the final aesthetic. Consider the intended location of the lamp; its size and style should complement the surrounding décor. Factors such as the available space and the ambient lighting conditions should be taken into account.

Material Selection: Wood Species and Finishes

The choice of wood significantly impacts the lamp's final appearance and durability. Hardwoods such as oak, walnut, mahogany, or cherry offer superior strength and a more refined grain pattern, resulting in a more luxurious finish. Softwoods like pine or fir are more readily available and less expensive, but may require additional care to prevent damage. Consider the wood's color, grain pattern, and overall aesthetic appeal in relation to the intended design. The selection should also account for the wood's workability; some woods are more challenging to work with than others. This selection directly influences the tools and techniques employed throughout the process.

Selecting the appropriate finish is equally important. Several options exist, each offering a different level of protection and aesthetic effect. Oil finishes enhance the wood's natural beauty while providing moderate protection against moisture and wear. Lacquer finishes offer superior durability and a high-gloss shine, but can mask the wood's natural grain. Varnish provides a durable, clear coating that protects against scratches and UV damage. The chosen finish should complement the wood's natural characteristics and enhance the overall design of the lamp.

Phase 2: Construction of the Lamp Base

Cutting and Shaping the Base

Once the design is finalized and the materials are selected, the construction phase commences. Precise measurements are essential for ensuring the lamp base is structurally sound and aesthetically pleasing. Using a suitable saw – whether a hand saw, table saw, or band saw – accurately cut the wood pieces to the required dimensions. The chosen cutting method should align with the wood's properties and the complexity of the design. For intricate designs, a jigsaw or scroll saw may be more appropriate. Following the cutting process, carefully sand the edges to achieve a smooth finish, preventing splintering and ensuring safety during handling.

Assembling the Base Components

The method of assembling the base components will depend on the design. Joinery techniques such as mortise and tenon joints, dovetail joints, or even simpler butt joints can be used. The chosen joint type should align with the overall aesthetic and structural integrity requirements. Strong and secure joints are paramount to ensure the lamp base can support the weight of the lampshade and electrical components without compromising structural integrity. Appropriate glue and clamps should be used to securely fasten the joints. Allow sufficient drying time before proceeding to the next stage to ensure a robust and long-lasting structure.

Phase 3: Electrical Wiring and Lamp Shade Holder

Choosing the Right Electrical Components

Safety is of utmost importance when working with electricity. Use only components rated for the correct voltage and wattage. Select a lamp socket and cord that are compatible with the chosen light bulb type and wattage. Ensure all electrical connections are secure and properly insulated to prevent short circuits and fire hazards. Adhere rigorously to all local electrical codes and regulations. Consult a qualified electrician if you are unsure about any aspect of the electrical wiring process.

Installing the Electrical Components

Carefully drill a hole in the base to accommodate the lamp cord and socket. This requires precision to ensure the components fit snugly and securely. Use appropriate sized drill bits to avoid damaging the wood. Secure the socket and wiring to the lamp base using suitable screws or fasteners, ensuring all connections are firmly fixed and insulated. Route the cord through the drilled hole, ensuring it is neatly concealed within the base. Thoroughly test the electrical connections before proceeding to the next step, using a voltage tester to confirm that the wiring is correctly installed and functioning safely.

Attaching the Lamp Shade Holder

The method of attaching the lamp shade holder will depend on the design. It may be directly mounted to the base, or it could be attached to a separate post or arm. Ensure the holder is securely attached and able to support the weight of the lampshade without wobbling or instability. Use appropriate screws and fasteners that are compatible with the wood's properties and the holder's design. The lampshade holder should be positioned at a height that complements the overall proportions of the lamp, ensuring both functionality and aesthetic appeal.

Phase 4: Finishing and Assembly

Sanding and Finishing the Lamp

Before applying the finish, carefully sand the entire lamp base to remove any imperfections, ensuring a smooth surface. Start with coarser grit sandpaper and gradually move to finer grits, achieving a progressively smoother finish. Apply the chosen finish according to the manufacturer's instructions, ensuring even coverage and avoiding drips or runs. Multiple coats may be necessary to achieve the desired level of protection and aesthetic effect. Allow sufficient drying time between coats to prevent problems such as bubbling or cracking.

Final Assembly and Testing

Once the finish is completely dry, assemble the lampshade and test the electrical components. Ensure the lampshade is securely attached to the holder and that the light bulb functions correctly. The lamp should be stable and free of any wobbling or instability. Inspect all electrical connections to ensure they are secure and properly insulated. Following a thorough visual inspection, conduct a final functionality test before deeming the project complete. Appropriate safety precautions must be observed throughout this process, with particular attention to electrical safety.

This comprehensive guide offers a detailed framework for crafting a bespoke wooden lamp. By diligently following these steps and prioritizing safety, you can create a unique and functional piece that reflects both skill and artistry. Remember that the design process and material selection are crucial for determining the final result, therefore meticulous planning is indispensable to the project's success.

Read more

Armoire Furniture Plans for Stylish and Efficient Storage Solutions

,

Armoire Furniture Plans for Stylish and Efficient Storage Solutions

Transform your living space with a custom-built armoire! These versatile pieces offer a blend of stylish design and efficient storage, perfect for bedrooms, living rooms, or even home offices. Forget generic storage solutions; this article provides detailed plans and inspiration to craft an armoire that truly reflects your personal style and meets your specific storage needs. We'll guide you through the process, from initial design considerations to final assembly, ensuring a rewarding DIY project.

Planning Your Armoire: Size, Style, and Function

Before diving into the construction, careful planning is crucial. Consider the dimensions of your space and the amount of storage required. Measure the area where the armoire will reside, leaving ample room for opening doors and accessing contents. Next, define your desired style. Will it be a classic, rustic, modern, or eclectic piece? Browse online resources and furniture catalogs for inspiration. Select materials that align with your style and budget – options range from solid wood for a luxurious feel to more affordable engineered wood or plywood. Finally, prioritize functionality. Sketch a detailed floor plan indicating the internal compartments – hanging rods, shelves, drawers, and any specialized storage for items like shoes or folded clothing. This detailed plan will serve as your blueprint throughout the building process.

Choosing the Right Materials

The choice of materials significantly impacts the armoire's aesthetics and durability. Solid wood like oak, cherry, or maple offers superior strength and beauty, but it's typically more expensive. Engineered wood or plywood provides a cost-effective alternative without compromising on stability. Consider the wood's grain and color, selecting options that complement your existing décor. For a more rustic look, reclaimed wood adds character and a unique patina. Select high-quality hardware – sturdy hinges, durable drawer slides, and attractive knobs or pulls – to ensure long-lasting functionality and elevate the armoire's overall appearance.

Detailed Construction Plans: A Step-by-Step Guide

Once your design is finalized, you can begin the construction phase. We'll focus on a standard armoire design, but you can adapt it to your unique plan. Start by creating the frame using well-cut pieces of your chosen wood. Assemble the frame using wood glue and screws, ensuring square corners and tight joints. Next, build the interior components—shelves, drawers, and hanging rods. Carefully measure and cut each component to ensure a perfect fit. Then, attach the interior elements to the frame. Install the doors, paying close attention to proper alignment and hinge placement. Finish by attaching the hardware. Sand all surfaces smooth, ensuring a flawless finish.

Essential Tools and Equipment

Building an armoire requires a range of tools. You'll need:

  • Measuring tape and square
  • Saw (circular saw, miter saw, or hand saw)
  • Drill and drill bits
  • Screwdriver (both Phillips and flathead)
  • Wood glue
  • Clamps
  • Sandpaper (various grits)
  • Wood finish (stain, paint, or varnish)
  • Hardware (hinges, knobs, drawer slides)

Finishing Touches and Customization

After assembling the armoire, apply your chosen finish. Sanding is crucial before applying any finish to ensure a smooth surface. Apply stain or paint evenly, allowing sufficient drying time between coats. Consider adding a protective topcoat of varnish or polyurethane for increased durability. Finally, install the hardware and admire your masterpiece! Don't hesitate to personalize your armoire further. Consider adding decorative molding, inlays, or carvings to enhance its aesthetic appeal. A unique paint finish, such as a distressed look or a bold color, can further transform the piece into a statement piece.

Building your own armoire is a rewarding experience that allows you to create a truly unique and functional piece of furniture. Remember to take your time, follow the instructions carefully, and enjoy the process of bringing your vision to life!

Read more

Saturday, February 1, 2025

Design a Modern Woodworking Project with These Plans

,

Crafting a Modernist Coffee Table with Integrated Storage: A Comprehensive Guide

This document details the design and construction of a contemporary coffee table featuring integrated storage, crafted primarily from sustainably sourced hardwood. The project emphasizes clean lines, minimalist aesthetics, and functionality, showcasing the beauty of natural wood grain while incorporating modern joinery techniques. The design aims for a piece that seamlessly blends with diverse interior styles, from mid-century modern to contemporary minimalist settings.

I. Design Specifications and Material Selection

A. Overall Dimensions and Proportions

The coffee table will measure 48 inches in length, 24 inches in width, and 16 inches in height. These dimensions provide ample surface area while maintaining a proportionate and visually appealing form. The height is specifically chosen for optimal comfort when seated on a standard-height sofa or armchair. The rectangular form is chosen for its simplicity and adaptability to various room layouts. Slight variations in dimensions may occur depending on the specific lumber used and the tolerances of the woodworking machinery.

B. Material Selection and Sourcing

The primary material for this project is American walnut, chosen for its rich color, distinctive grain pattern, and inherent strength. The walnut will be sourced from a reputable supplier committed to sustainable forestry practices, ensuring the longevity of this valuable resource. The wood should be kiln-dried to a moisture content of 6-8% to minimize warping and shrinkage during construction. Alternative hardwood species, such as cherry or maple, can be substituted based on personal preference and availability, though adjustments to finishing techniques might be necessary.

C. Integrated Storage Compartment Design

A central storage compartment is integrated into the table's design. This compartment will be accessed via a lift-top mechanism, allowing for easy storage and retrieval of items. The compartment's internal dimensions will be approximately 40 inches in length, 20 inches in width, and 6 inches in depth, providing ample space for magazines, remotes, or other living room essentials. The lift-top mechanism will employ high-quality hardware, ensuring smooth and reliable operation.

II. Construction Techniques and Joinery

A. Cutting and Preparation of Lumber

The initial phase involves precise cutting of the walnut boards to their specified dimensions. A table saw equipped with a fine-tooth blade will be used for accurate crosscuts and rips. A jointer and planer will ensure the boards are perfectly flat and smooth, creating a stable base for the subsequent assembly. The boards should be meticulously inspected for knots or imperfections that might compromise structural integrity. Any imperfections should be addressed through careful selection or strategic placement of wood pieces.

B. Assembly of the Tabletop

The tabletop will be constructed from three 16-inch wide walnut boards, edge-joined using a half-lap joint. This joint offers superior strength and a visually appealing flush surface. Precision is crucial for this process; any misalignment will be readily apparent in the finished product. Clamps will be used to hold the boards securely during glue-up, ensuring a tight and even bond. After glue-up, the excess glue will be carefully removed, and the tabletop will be sanded smooth.

C. Construction of the Storage Compartment

The storage compartment will be constructed from 1/2-inch thick walnut plywood. Dado joints will be used to create the rabbets for the sides and bottom panels. A router equipped with a dado blade will be used to precisely cut the dadoes, ensuring a tight fit. The plywood will be carefully glued and clamped to ensure a rigid and durable compartment. The compartment's interior will be carefully sanded for a smooth finish, ensuring that items placed within are not scratched or damaged.

D. Integration of the Lift-Top Mechanism

The lift-top mechanism, a commercially available gas-spring system, will be carefully integrated into the design. Precise measurements and pilot holes will be drilled to ensure a flawless fit and function. The mechanism will be securely attached to both the tabletop and the compartment base, ensuring smooth operation and preventing unwanted movement. The hardware chosen should be durable and capable of withstanding repeated use. The functionality of the lift-top will be tested multiple times before proceeding to the final finishing stages.

E. Assembly of the Table Base

The table base will consist of four sturdy legs, connected by a simple frame constructed from 2x2 inch walnut stock. The legs will be precisely cut to length and mitered at a 45-degree angle for a clean and modern aesthetic. Mortise and tenon joints will be used to connect the legs to the frame, ensuring robust structural integrity. The joints will be carefully glued and reinforced with wood screws for added strength and stability.

F. Attaching Tabletop and Base

The completed tabletop and base will be securely attached using robust dowel joints and wood glue. Precisely drilled pilot holes will ensure that the screws won't split the wood. The dowel joints provide a strong and invisible connection, maintaining the clean lines of the design. The finished assembly will be carefully checked for stability and levelness before moving on to the finishing stages.

III. Finishing and Detailing

A. Sanding and Preparation

Prior to finishing, the entire table will undergo meticulous sanding. Multiple grits of sandpaper, starting with coarser grits and progressing to finer grits, will be used to achieve a perfectly smooth surface. This ensures that the final finish will adhere evenly and highlight the beauty of the walnut grain. The sanding process will be followed by thorough cleaning to remove all sanding dust.

B. Applying the Finish

A high-quality oil-based polyurethane finish will be applied to protect the wood and enhance its natural beauty. Multiple thin coats will be applied, allowing each coat to dry thoroughly before applying the next. This process will be repeated until a smooth, durable, and even finish is achieved. The final coat will be lightly buffed to bring out the luster of the wood.

C. Final Inspection and Quality Control

Before the project is considered complete, a thorough inspection will be conducted to ensure that all aspects meet the design specifications and quality standards. Any minor imperfections will be addressed, and any necessary adjustments made. The lift-top mechanism will be rigorously tested to confirm smooth operation. The finished product will undergo a final cleaning and be prepared for delivery or installation.

IV. Conclusion

This detailed plan outlines the construction of a sophisticated and functional modern coffee table with integrated storage. The combination of high-quality materials, precise joinery techniques, and meticulous finishing results in a piece that transcends mere functionality to become a statement of refined design and craftsmanship. The focus on sustainable materials and responsible manufacturing ensures that this piece will be enjoyed for years to come. Through careful attention to detail and the utilization of advanced woodworking techniques, this project offers a rewarding experience for the dedicated woodworker.

Read more

Barbie Furniture Plans for Crafting Tiny, Perfect-Scale Pieces

,

Barbie Furniture Plans for Crafting Tiny, Perfect-Scale Pieces

Introduction: Embarking on a Miniature Crafting Journey

The enduring appeal of Barbie dolls transcends generations, fueled by the imaginative possibilities they unlock. A significant aspect of this imaginative play is the creation of a meticulously detailed world, a miniature realm reflecting the larger human experience. This necessitates the crafting of exquisitely scaled furniture, a task that demands precision, patience, and a keen eye for detail. This comprehensive guide provides detailed plans for constructing a selection of Barbie-scale furniture pieces, empowering crafters of all skill levels to build a truly enchanting miniature world for their beloved dolls.

The creation of these miniature pieces is not merely a child's pastime; it's a sophisticated craft that blends artistry with technical skill. It necessitates a comprehensive understanding of scale, material selection, and meticulous construction techniques. From conceptualization to final finishing touches, each step contributes to the overall aesthetic and functional integrity of the miniature furniture.

Material Selection: Choosing the Right Tools and Resources

The success of any miniature crafting project hinges on the judicious selection of materials. The following materials are recommended for constructing durable and aesthetically pleasing Barbie-scale furniture:

Wood Selection and Preparation

Balsa wood is an ideal choice due to its lightweight nature, ease of carving, and exceptional ability to hold detail. Basswood offers greater strength and is suitable for pieces requiring more structural integrity. Before commencing construction, sand the wood to a smooth finish, eliminating any imperfections that might compromise the final product's aesthetic appeal. This sanding process should be gradual, starting with coarser grit sandpaper and progressively moving to finer grits to achieve a flawlessly smooth surface.

Other Essential Materials

Beyond wood, a variety of other materials are crucial for completing the furniture:

  • Glue: A high-quality wood glue is essential for strong, durable joints. White craft glue is also suitable for smaller components.
  • Paint: Acrylic paints are recommended for their versatility, vibrant colors, and ease of application. Ensure proper ventilation during the painting process.
  • Varnish or Sealant: A clear varnish or sealant will protect the finished furniture from moisture and wear, enhancing its longevity.
  • Small Brads or Pins: These are useful for securing smaller components, particularly when glue alone may not suffice.
  • Fine-grit Sandpaper: Essential for smoothing surfaces and achieving a professional finish. Various grits are needed for different stages of sanding.
  • Measuring Tools: Precise measurements are paramount; use a ruler, caliper, or even a finely marked metal straightedge.
  • Craft Knives and Scissors: Sharp tools are essential for clean cuts and precise detail work. Exercise caution when using these tools.
  • Fabric Scraps: For upholstery on chairs and sofas.
  • Small Beads or Decorative Elements: To add embellishments and enhance the visual appeal.

Detailed Plans: Crafting Specific Furniture Pieces

The following outlines the construction of several essential furniture pieces for a Barbie dollhouse:

A Miniature Armoire

Dimensions (approximate): 2 inches wide, 3 inches tall, 1 inch deep. This armoire will consist of a simple box with a hinged door. Construct the box using balsa wood, carefully joining the sides, top, bottom, and back with glue. Create a simple door using two smaller pieces of wood, hinged using small brads or carefully placed glue. Sand the entire armoire, paint it a desired color, and add decorative details as desired. A small knob or pull can be added for extra realism.

A Tiny Sofa

Dimensions (approximate): 3 inches wide, 1.5 inches deep, 1 inch high. This project requires more advanced techniques. Cut the base from balsa wood, creating a slightly curved shape to mimic a sofa's form. Cut out the back and armrests from separate pieces and carefully glue them in place. Use small fabric scraps to upholster the sofa. Ensure the fabric is taut and neatly wrapped around the base and cushions. A thin layer of batting can be used to soften the look and feel.

A Delicate Dressing Table

Dimensions (approximate): 2 inches wide, 2 inches deep, 1.5 inches high. This dressing table can be built using a small rectangular piece of balsa wood for the tabletop. Use smaller pieces to create legs, attaching them securely to the table. A small mirror can be crafted from a reflective material, such as thin plastic or even carefully cut aluminum foil. Decorate with small beads or other decorative elements to enhance its elegance.

A Miniature Bed

Dimensions (approximate): 3 inches long, 1.5 inches wide, 1 inch high. The bed frame can be built from balsa wood, creating a simple rectangular frame. Cut smaller pieces for the headboard and footboard. The mattress can be made from a small piece of foam or felt, covered in a fabric scrap. A miniature blanket can be created from a small square of fabric.

A Charming Chair

Dimensions (approximate): 1.5 inches wide, 1.5 inches deep, 1.5 inches high. This chair can be crafted using balsa wood, mimicking the classic design of a simple armchair. Carefully carve out the seat and back, paying close attention to achieving a smooth, curved shape. Once painted, consider adding fabric upholstery to the seat for added detail. Small wooden dowels or beads can be used to create the legs.

Finishing Touches and Refinement: Enhancing the Miniature Masterpieces

Once the furniture pieces are constructed, attention should be given to the finishing touches that elevate them from simple models to exquisite miniature works of art. Sanding is crucial to achieving a smooth, flawless surface. This should be done methodically, starting with coarser sandpaper and progressively using finer grits to ensure an impeccably smooth finish. Once sanded, carefully apply the chosen paint, ensuring even coverage and allowing adequate drying time between coats. After painting, a coat of varnish or sealant will protect the furniture from wear and tear, significantly enhancing its longevity. Finally, the addition of small decorative elements—tiny knobs, beads, or other embellishments—will complete the transformation, adding a touch of individual style and character.

Conclusion: A World of Miniature Possibilities

Crafting Barbie-scale furniture is a rewarding endeavor that combines precision, creativity, and meticulous attention to detail. This guide provides a foundation for constructing a wide range of miniature pieces, encouraging experimentation and personalized design choices. With patience, practice, and a dash of imagination, crafters can create a truly enchanting miniature world for their Barbie dolls, a testament to the enduring power of creative expression and the joy of handcrafted artistry.

Read more

Saturday, January 25, 2025

DIY Wooden Wall Signs with Names or Quotes for Home Décor

,

Craft Your Dream Home: DIY Wooden Wall Signs

Transform your house into a home with personalized charm using handcrafted wooden wall signs! This rewarding DIY project allows you to express your unique style and create meaningful décor that reflects your personality or commemorates special moments. Whether you’re a seasoned crafter or a complete beginner, creating a beautiful wooden sign is surprisingly accessible. This guide will walk you through the process, from selecting materials to adding the finishing touches, ensuring you create a piece you'll treasure for years to come.

Gathering Your Supplies: A Foundation for Success

Before you unleash your creativity, gather all the necessary supplies. This step is crucial to ensure a smooth and enjoyable crafting experience. Don't rush; take your time to select materials that align with your vision. The quality of your materials will directly impact the final look and longevity of your sign. A poorly chosen wood type, for instance, might crack or warp over time. Consider these essential items:

Essential Materials:

  • Wood: Choose a wood type that suits your style and desired level of durability. Popular choices include pine (affordable and easy to work with), reclaimed wood (rustic charm), or even plywood (for a smoother finish). Consider the thickness; thicker wood provides a more substantial feel.
  • Sandpaper: Several grits are recommended, ranging from coarse to fine, to ensure a smooth surface for painting or staining. Start with a coarser grit to remove any imperfections and gradually progress to finer grits for a flawless finish.
  • Paint or Stain: Select your preferred finish based on your desired aesthetic. Chalk paint provides a vintage look, while acrylic paints offer vibrant colors. Stain brings out the natural wood grain and provides a more natural finish. Don’t forget a sealant to protect your hard work.
  • Stencil or Letters: If you're adding text, you’ll need stencils, letter stamps, or a fine-tipped paintbrush for precise lettering. Choose a font that complements your design.
  • Other Decorative Elements: Consider adding embellishments such as ribbon, twine, metal accents, or dried flowers to enhance the overall design. Let your imagination guide you!

Crafting Your Masterpiece: From Blank Slate to Beautiful Sign

With your supplies ready, it’s time to transform your blank piece of wood into a personalized masterpiece. This is where your creativity truly shines. Begin by sanding your wood to create a smooth surface. This step prevents chipping and ensures the paint or stain adheres properly. After sanding, apply your chosen paint or stain, following the manufacturer's instructions. Allow ample drying time before proceeding. If using a stencil, carefully apply it to the wood and use a sponge brush or fine-tipped brush to apply paint. Remove the stencil gently to reveal your perfectly crisp lettering or design. Remember, precision is key here!

Adding the Finishing Touches: The Secret to Perfection

Once the paint or stain is completely dry, apply a protective sealant to guard against moisture and wear. This essential step preserves your hard work and ensures your beautiful sign will endure. Allow the sealant to dry completely. Finally, add any decorative elements you’ve chosen. Whether it's a simple ribbon or intricate embellishments, these finishing touches add a personal flair and complete the overall design. Step back and admire your creation â€" you've successfully crafted a one-of-a-kind wooden wall sign!

Displaying Your Creation: Sharing Your Artistic Flair

Now for the final and most satisfying step: displaying your beautiful wooden wall sign! Find the perfect spot in your home that highlights its unique charm. Consider the overall aesthetic of the room and choose a location that complements your sign's design. Whether it's a prominent spot in your living room or a cozy corner in your bedroom, your handcrafted sign is sure to become a cherished piece of your home décor, a testament to your creativity and DIY prowess.

Read more

Wednesday, November 20, 2024

How to Market and Sell Wood Toolbox Organizers

,
How to Market and Sell Wood Toolbox Organizers

Marketing and Selling Wood Toolbox Organizers: A Practical Guide

You've got the skills to make fantastic wood toolbox organizers, but are you struggling to get them in front of the right buyers? Don't worry, you're not alone! Marketing and selling handmade goods can feel like a whole new world. But with the right strategy, you can turn your passion into profit.

This guide will break down everything you need to know about marketing and selling wood toolbox organizers, from understanding your target market to promoting your products online and offline.

Understanding Your Target Market

First things first, you need to understand who your ideal customer is. What kind of people are most likely to buy your wood toolbox organizers? Ask yourself:

  • Are they professional tradespeople?
  • Do they enjoy DIY projects?
  • Are they looking for a unique and handcrafted gift?

Once you have a clear picture of your target audience, you can tailor your marketing efforts to their specific needs and interests.

Crafting a Compelling Brand Story

Think about what makes your wood toolbox organizers special. What's your unique selling proposition (USP)?

Here are some ideas to get you started:

  • High-quality craftsmanship: Emphasize the durability and longevity of your wood organizers. Highlight the use of premium wood and meticulous construction techniques.
  • Personalized customization: Do you offer engraving, specific wood choices, or other custom options? This is a huge selling point for many customers.
  • Unique designs: Do you have a distinctive style or offer creative solutions for organizing tools? This will attract buyers looking for something special.
  • Eco-friendly materials: If you use sustainable wood or environmentally-conscious practices, promote this to appeal to eco-conscious buyers.

Once you've identified your USP, craft a clear and concise brand story that highlights its value. This story should be woven into all your marketing materials.

Building an Online Presence

In today's digital age, having a strong online presence is crucial. You can reach a wider audience and sell your products directly to customers from anywhere in the world. Here are some key platforms:

E-commerce Websites

Setting up an e-commerce website gives you complete control over your brand and allows you to showcase your products in detail. Popular platforms like Shopify, Etsy, and Wix make it easy to create a professional online store.

Social Media Marketing

Use social media to engage with your target audience, build brand awareness, and drive traffic to your website. Popular platforms like Instagram, Pinterest, and Facebook offer unique features to showcase your woodworking skills.

  • Instagram: Use high-quality photos and videos to showcase the beauty and functionality of your organizers. Use relevant hashtags to reach a wider audience.
  • Pinterest: Create eye-catching pins featuring images of your organizers and inspirational DIY projects. Pinterest is a great platform for attracting customers interested in woodworking and home improvement.
  • Facebook: Create a business page to share updates, run ads, and connect with potential customers. Use Facebook groups related to woodworking, DIY, and tradespeople to reach your target audience.

Offline Marketing Strategies

Don't underestimate the power of offline marketing! Here are some ideas to reach local customers:

Local Craft Fairs and Markets

Participating in local craft fairs and markets is a great way to connect with potential customers face-to-face, showcase your products, and build relationships. You can also offer special promotions and discounts at these events.

Networking with Local Businesses

Reach out to local businesses that cater to your target audience, such as hardware stores, home improvement centers, and furniture retailers. Consider offering your organizers for sale in their stores or partnering with them on promotional events.

Word-of-Mouth Marketing

Don't underestimate the power of word-of-mouth. Encourage satisfied customers to leave reviews on your website and social media pages. Offer referral programs to reward customers for spreading the word about your business.

Pricing Your Products

Pricing your wood toolbox organizers can be tricky. You need to consider:

  • Cost of materials: Calculate the cost of wood, hardware, and other materials.
  • Labor costs: Factor in the time and effort it takes to design, build, and finish your organizers.
  • Competition: Research what other makers are charging for similar products.
  • Target market: Consider what your target audience is willing to pay for a high-quality wood organizer.
  • Profit margins: Set prices that will cover your costs and allow you to make a profit.

You can experiment with different pricing strategies, like:

  • Cost-plus pricing: Add a markup to your cost of goods.
  • Value-based pricing: Set prices based on the perceived value of your products.
  • Competitive pricing: Match or slightly undercut the prices of competitors.

Commonly Asked Questions

Q: How do I protect my woodworking designs?

A: You can apply for a design patent, but it's important to consult with an intellectual property attorney to understand your options and legal requirements. You can also protect your designs by clearly labeling them as your own and taking steps to prevent others from copying them.

Q: What are the best ways to photograph my wood toolbox organizers?

A: Use natural light whenever possible, and try to capture the unique details and craftsmanship of your organizers. Use a simple background that won't distract from your products.

Q: How do I get started with selling online?

A: Start by choosing an e-commerce platform that fits your needs and budget. Create a professional website or shop with high-quality product photos and detailed descriptions. Promote your products on social media and through online marketplaces.

Q: How do I handle shipping and returns?

A: Research shipping rates and services to find the best options for your products. Provide clear and easy-to-understand shipping policies on your website. Offer a fair and reasonable return policy to build trust with your customers.

Q: What are some tips for building my email list?

A: Offer freebies, discounts, and exclusive content to encourage customers to sign up for your email list. Use pop-up forms on your website and social media to capture email addresses. Create a newsletter that provides valuable content and promotes your products.

Marketing and selling your wood toolbox organizers can be a rewarding experience. By understanding your target market, crafting a compelling brand story, building an online presence, and utilizing offline strategies, you can reach more customers and grow your business.

Read more

DIY Tiered Plant Stands for Small-Space Living

,
DIY Tiered Plant Stands for Small-Space Living

DIY Tiered Plant Stands for Small-Space Living

Transform your small space into a lush, verdant oasis with DIY tiered plant stands. These versatile structures allow you to showcase your beloved greenery while maximizing vertical space. You'll not only create a visually stunning display but also elevate your home decor with a touch of nature. Whether you prefer a rustic, modern, or minimalist aesthetic, the possibilities for customization are endless.

Benefits of Tiered Plant Stands

Tiered plant stands offer several advantages for small-space living:

  • Maximize Vertical Space: Utilize unused wall space to create a vertical garden that adds life and color to your home.
  • Versatile Design: Tiered stands come in a variety of shapes, sizes, and materials, allowing you to find the perfect fit for your space and style.
  • Boost Your Greenery: Showcase your plants in a visually appealing way, allowing you to display more plants in a limited area.
  • Affordable Solution: Compared to pre-made stands, DIY options offer a cost-effective way to achieve a similar look.

Materials You'll Need

The beauty of DIY plant stands lies in their adaptability. Depending on your chosen design, you'll likely need these basic materials:

  • Wood: Choose from plywood, reclaimed wood, or even sturdy branches.
  • Metal Pipes or Rods: For a modern look, use metal pipes or rods.
  • Screws and Nuts: For assembling the stand.
  • Sandpaper: To smooth out rough edges and create a polished finish.
  • Paint or Stain: Optional, for adding color and personality.

Design Ideas for Tiered Plant Stands

Rustic Charm

Embrace the beauty of natural wood with a rustic tiered plant stand. Use reclaimed wood planks of varying sizes to create a unique and charming display. Distressed finishes and uneven cuts add to the rustic aesthetic.

Industrial Chic

For a modern and industrial feel, opt for metal pipes and rods. You can create simple square or rectangular tiers using pipe fittings and sturdy wood planks. The raw metal adds a touch of urban edge.

Minimalist Elegance

For a clean and minimalist design, use thin plywood or MDF boards to create sleek tiers. Simple geometric shapes and a neutral color palette create a sophisticated look.

Steps for Building a Tiered Plant Stand

  1. Measure and Cut: Determine the desired size and number of tiers. Measure and cut your wood or metal pieces accurately.
  2. Assemble the Base: Create a sturdy base for your stand. You can use thick wood planks or metal pipe fittings.
  3. Create the Tiers: Cut the wood or metal for each tier to the desired dimensions. Use screws or brackets to secure each tier to the base.
  4. Sand and Finish: Smooth out any rough edges with sandpaper. If desired, paint or stain your stand to create the desired look.
  5. Add a Personal Touch: Decorate your stand with decorative elements like rope, metal rings, or small wooden beads.

Tips for Success

Follow these tips for a successful DIY tiered plant stand project:

  • Consider the Weight: Ensure the stand is strong enough to support the weight of your plants. Use sturdy materials and secure connections.
  • Choose the Right Plants: Select plants that thrive in similar conditions and that are suitable for the size and shape of your stand.
  • Experiment with Style: Don't be afraid to get creative! Mix and match materials and finishes to create a truly unique plant stand.

By following these tips and exploring different design ideas, you can create a stunning DIY tiered plant stand that adds a touch of green and personality to your small-space living.

Read more

Monday, November 18, 2024

Stylish Modern Coffee Tables That Appeal to Minimalists and Organizers

,
Stylish Modern Coffee Tables That Appeal to Minimalists and Organizers

Stylish Modern Coffee Tables That Appeal to Minimalists and Organizers

In the realm of interior design, a coffee table serves as a focal point, a functional piece that seamlessly blends style and practicality. For those embracing the principles of minimalism and organization, the selection of a coffee table becomes a meticulous endeavor, a quest for a piece that embodies both aesthetic appeal and efficient functionality. This article delves into the captivating world of stylish modern coffee tables, meticulously crafted to cater to the discerning tastes of minimalists and organizers.

Embracing Minimalism: A Symphony of Simplicity

Minimalism, a design philosophy rooted in simplicity and functionality, thrives on clean lines, uncluttered surfaces, and a curated selection of essential elements. For coffee tables, minimalism translates into sleek silhouettes, understated materials, and a deliberate absence of extraneous embellishments. The goal is to create a sense of calm and serenity, allowing the beauty of the table itself to take center stage.

Geometric Forms and Streamlined Silhouettes

Minimalist coffee tables often embrace geometric forms, such as squares, rectangles, and circles. These shapes exude a sense of order and sophistication, seamlessly integrating into modern living spaces. Streamlined silhouettes, devoid of unnecessary curves or ornamentation, further enhance the minimalist aesthetic, ensuring a clean and uncluttered visual appeal.

Neutral Color Palettes and Natural Materials

Minimalism favors a muted color palette, often embracing neutral hues like white, black, gray, and beige. These colors provide a timeless backdrop, allowing other elements in the room to take center stage. Natural materials such as wood, metal, and stone are often incorporated, adding warmth and texture while maintaining a sense of understated elegance.

Organizing for Efficiency: Functional Elegance

For organizers, a coffee table is not just a decorative element but a practical hub for everyday living. It must seamlessly integrate storage solutions, keeping items within easy reach while maintaining a clutter-free environment.

Built-in Storage and Hidden Compartments

Many modern coffee tables feature built-in storage solutions, such as drawers, shelves, or compartments. These hidden compartments provide a discreet space to store remotes, magazines, or other items, keeping the table surface uncluttered and organized. Look for tables with drawers that extend smoothly, offering easy access to stored belongings.

Multifunctional Design: Coffee Tables That Double as Ottomans

Modern design often prioritizes functionality, and some coffee tables seamlessly transform into ottomans. These versatile pieces provide additional seating when needed, offering a practical solution for entertaining guests or simply lounging in comfort. Choose tables with durable upholstery that complements the overall aesthetic of your living space.

Stylish Modern Coffee Tables for Minimalists and Organizers: A Curated Selection

Here is a curated selection of stylish modern coffee tables that cater to the minimalist and organized aesthetic:

The Sculptural Coffee Table

This coffee table is characterized by its striking geometric form, often featuring a minimalist design with clean lines and a sculptural presence. The table's form itself becomes a piece of art, adding a touch of elegance to any living space. Made from high-quality materials such as wood, metal, or stone, it exudes a sense of durability and sophistication.

The Coffee Table with Storage

This practical choice incorporates hidden storage compartments, offering a discreet way to keep items organized. Look for tables with drawers, shelves, or lift-top mechanisms, providing easy access to stored belongings. The table's streamlined design maintains a minimalist aesthetic, ensuring a clutter-free environment.

The Multifunctional Coffee Table

This versatile piece combines the functionality of a coffee table with the comfort of an ottoman. It features a lift-top mechanism, allowing the table to transform into a spacious seating surface. The upholstery should complement the table's design, creating a cohesive and stylish look.

Choosing the Perfect Coffee Table: Tips for Minimalists and Organizers

When selecting a coffee table for your minimalist or organized living space, consider these key factors:

Size and Scale

Choose a coffee table that is proportionate to the size of your living room, ensuring it does not overwhelm the space. A larger table may be ideal for a spacious living room, while a smaller table may be more suitable for a smaller space.

Material and Finish

Opt for materials that complement the overall design of your living space. Wood, metal, and stone are popular choices, each offering a unique aesthetic. Consider the finish, choosing a sleek and understated option that aligns with your minimalist preferences.

Storage Options

If storage is a priority, select a table with built-in compartments, drawers, or shelves. Choose a table that offers ample storage space without sacrificing its minimalist design.

Style and Functionality

Balance style and functionality. Choose a table that embodies the principles of minimalism, with clean lines and a streamlined silhouette. Consider its versatility, opting for a table that can serve multiple purposes, such as providing additional seating or storage.

Conclusion

For minimalists and organizers seeking a stylish and functional coffee table, the possibilities are endless. Embrace simplicity, prioritize organization, and select a piece that embodies both aesthetic appeal and efficient functionality. The right coffee table can transform your living space into a haven of serenity and order, reflecting your unique design preferences and lifestyle.

Read more

Wednesday, November 13, 2024

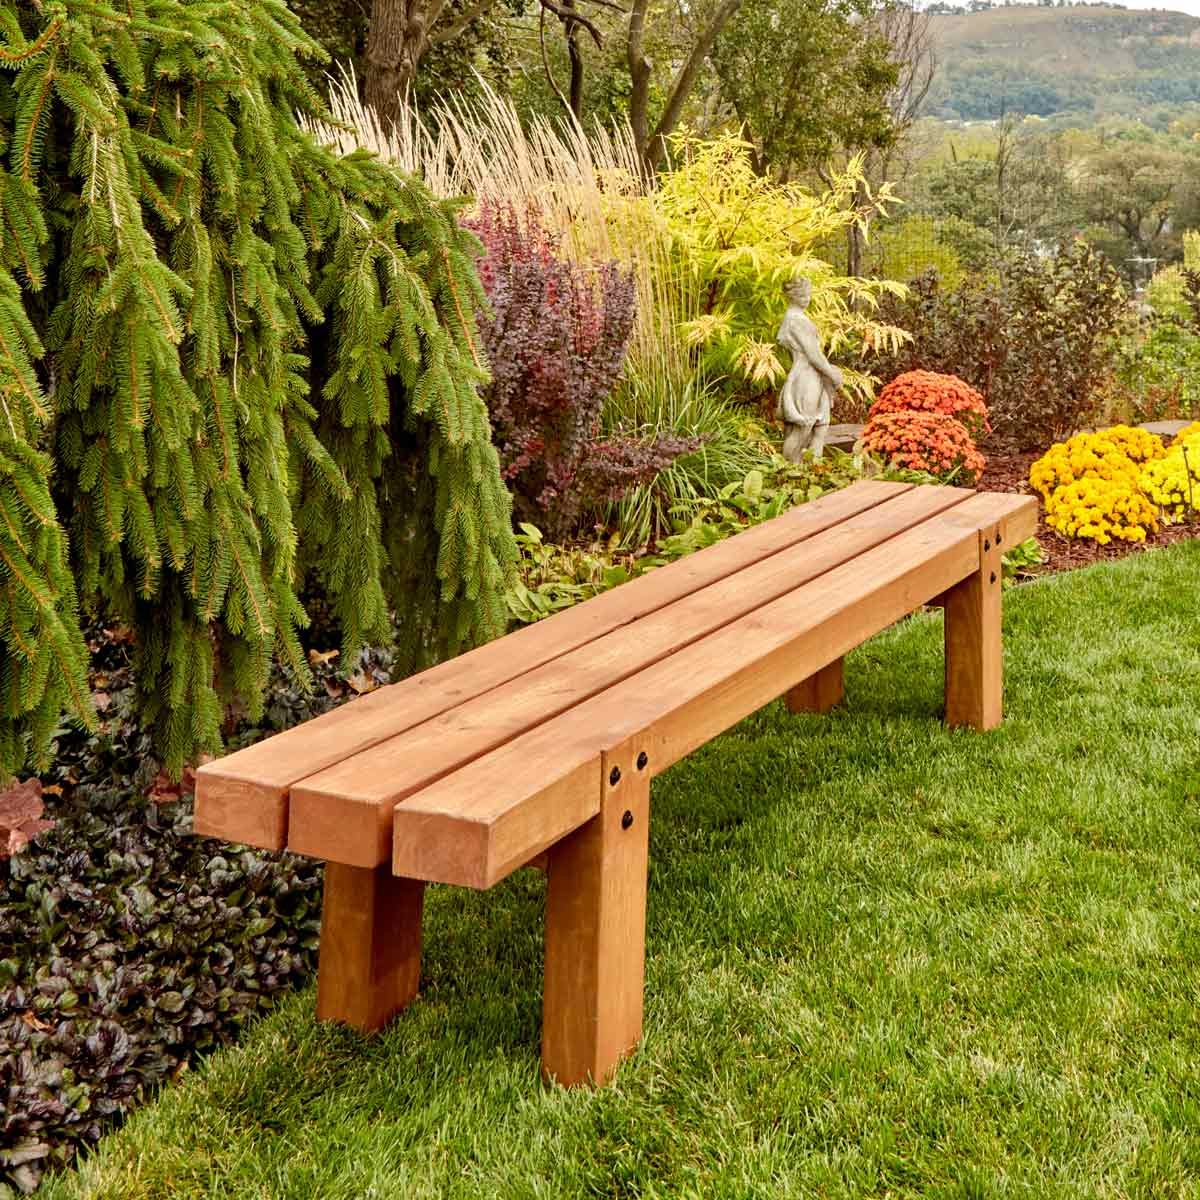
How to Sell Custom Wooden Benches at Craft Fairs and Online Shops

,
How to Sell Custom Wooden Benches at Craft Fairs and Online Shops

Crafting Your Path to Success: Selling Custom Wooden Benches at Craft Fairs and Online

Hey there, fellow woodworker! You've poured your heart and soul into crafting beautiful, unique wooden benches, and now you're ready to share them with the world. The thrill of seeing your creations bring joy to others is what fuels us, right? But getting your benches out there can feel like a mountain to climb. Don't worry, I'm here to guide you through the process, breaking down the steps into bite-sized chunks. We'll explore the exciting world of selling at craft fairs and online shops, leaving no stone unturned. Let's get started!

Craft Fairs: A Gateway to Your Customers

Craft fairs are a fantastic way to connect directly with potential buyers, showcase your work, and build a following. Imagine the buzz of the crowd, the excitement of sharing your passion, and the genuine joy when someone falls in love with your bench. It's a wonderful experience! But how do you make the most of it?

Choosing the Right Fairs

First things first, research. Don't just jump into any fair. Find ones that align with your target audience and style. Look for events that attract people who appreciate handcrafted furniture, like:

  • Local art and craft fairs
  • Home and garden shows
  • Farmers markets with a craft focus
  • Festivals with a strong handmade component

Check the event website for details like attendance numbers, vendor fees, and the overall vibe. It's a good idea to talk to other vendors who've participated in the fair you're considering â€" they'll be able to give you valuable insights.

Crafting a Stellar Booth Display

Think of your booth as a mini-gallery showcasing your artistry. Here's how to make it stand out:

  • Choose a cohesive color scheme and branding that reflects your style and the quality of your benches.
  • Showcase your best work strategically, placing the most eye-catching pieces in prominent spots. Use varying heights for a dynamic display.
  • Add visual interest with fabric drapes, plants, or rustic elements. These details help create an inviting atmosphere.
  • Don't forget clear pricing and information about your benches. Make it easy for customers to understand the details and options.
  • Invest in a quality backdrop or banner that adds professionalism and visually anchors your space.

Engaging with Customers

This is where your passion shines! Be genuinely interested in your customers' needs. Tell stories about your craft, explain the materials you use, and let them touch and feel the unique textures of your benches. Answer their questions patiently and enthusiastically. Remember, building relationships is key to success!

The Online Marketplace: Reaching a Wider Audience

The internet opens doors to a vast network of potential buyers worldwide. Selling your benches online is a game-changer, allowing you to reach customers who might never have crossed your path at a fair. But how do you navigate this digital world?

Choosing the Right Platforms

There are several options, each with its own strengths. Consider these popular platforms:

  • Etsy: Known for its handmade and vintage goods, Etsy is a natural fit for custom wooden benches. It's a highly visual platform where you can showcase your work beautifully. They also have a built-in payment system and marketing tools.
  • Shopify: If you want full control over your brand and online store, Shopify is a robust platform. It allows for customization and a wider range of features, like blog integration and email marketing.
  • Facebook Marketplace and Instagram Shopping: These platforms offer a great way to connect with your existing followers and reach new ones. They're excellent for showcasing your work visually and engaging with your audience.

Creating Compelling Product Listings

Your online product listings are your digital storefront. Make them shine!

  • High-quality, well-lit photos are essential. Show off your benches from multiple angles, highlighting the details and craftsmanship. Use a tripod and natural light for the best results.
  • Write detailed descriptions that engage the reader. Tell the story behind your benches, describe the materials and construction, and highlight their unique qualities. Use keywords that potential buyers might search for.
  • Offer various sizes, styles, and customization options to cater to different tastes and needs. This adds value to your listings.
  • Be transparent about shipping costs and estimated delivery times. This builds trust and avoids surprises.

Building an Online Presence

Beyond your product listings, create a strong online brand that resonates with your target audience. This means engaging with your customers, sharing your story, and building a community around your craft:

  • Use social media to showcase your work, share your passion, and interact with followers. Post behind-the-scenes glimpses, client testimonials, and interesting articles related to woodworking and design. Use relevant hashtags to increase visibility.
  • Start a blog or create a newsletter to connect with your audience on a deeper level, share tips and insights, and offer exclusive content.
  • Run promotions and offer discounts to encourage sales and reward loyal customers.

Beyond the Basics: Scaling Your Success

As you gain experience, consider expanding your reach and diversifying your sales channels. Here are a few ideas:

  • Partner with local shops or interior designers to showcase and sell your benches to a wider audience.
  • Offer workshops or classes to teach others the art of woodworking and share your knowledge.
  • Expand your product line to include complementary items like stools, tables, or garden furniture. This broadens your appeal and attracts a more diverse clientele.
  • Develop a strong brand identity that sets you apart from the competition. This includes a memorable logo, a consistent visual style, and a clear message about what you stand for.

Remember, success takes time, effort, and a passion for your craft. Stay focused, embrace the learning process, and never stop seeking ways to improve your skills and reach more customers. You've got this! Happy crafting!

Read more

Popular Woodworking Projects for New Woodworkers

,
Popular Woodworking Projects for New Woodworkers

Popular Woodworking Projects for New Woodworkers

So you're thinking about taking up woodworking? That's awesome! It's a rewarding hobby that can lead to some truly beautiful and useful creations. But where do you start? With so many possibilities, it can be overwhelming to choose your first project.

Don't worry, I'm here to help! I've put together a list of popular woodworking projects perfect for beginners. These projects are designed to be relatively easy to make, while still giving you a chance to learn some essential woodworking skills.

Beginner-Friendly Woodworking Projects

Let's dive into some projects that'll get you started on your woodworking journey. Remember, it's all about learning and having fun. Don't sweat the small stuff, just enjoy the process!

Simple Cutting Boards

Cutting boards are an excellent starting point. They're practical, relatively small, and allow you to practice your cutting skills.

  • Choose the right wood: Look for hardwoods like maple, cherry, or walnut, which are durable and resistant to knife marks.
  • Start small: Begin with a smaller board, maybe 12" x 18". It's easier to handle and less intimidating.
  • Use a miter saw or table saw: These tools will help you make precise cuts for your board.
  • Sand it smooth: Use various grits of sandpaper to achieve a smooth finish.
  • Finish with oil or wax: This protects the board and gives it a nice sheen.

You can even personalize your cutting board with a design or a custom inscription.

Rustic Wooden Shelves

Shelves are a fantastic project for showcasing your woodworking skills. They add functionality to any space and allow you to get creative with different wood types and finishes.

  • Keep it simple: Start with simple, rectangular shelves. You can even use pre-cut pieces from a lumberyard.
  • Choose sturdy brackets: Metal brackets are strong and easy to attach.
  • Sand and stain or paint: Experiment with different wood stains or paints to match your décor.

Think about where you'll place your shelves and what you'll be storing on them. This will help you determine the size and number of shelves you need.

Wooden Serving Trays

Serving trays are both functional and stylish. They're great for entertaining or adding a touch of elegance to everyday meals.

  • Choose a design: Simple rectangular trays are easy to make, but you can also explore more elaborate designs with curves or handles.
  • Use plywood or solid wood: Plywood is less expensive and easier to work with.
  • Cut and join the pieces: Use woodworking glue and clamps to secure the tray's sides and base.
  • Add handles: Use dowel rods or wooden handles for a comfortable grip.
  • Sand and finish: Choose a finish that complements your kitchen or dining room.

You can even customize your serving tray with a personalized engraving or inlay.

Wooden Birdhouses

Birdhouses are a fun and rewarding project, especially for beginners. They're relatively small and can be made using simple hand tools.

  • Choose a design: There are countless birdhouse designs online. Start with a simple design and gradually work your way up to more complex ones.
  • Use scraps or pine wood: You can use leftover scraps of wood or purchase cheap pine boards.
  • Measure and cut carefully: Accuracy is important for a well-constructed birdhouse.
  • Assemble the pieces: Use woodworking glue and nails to assemble the birdhouse.
  • Add a perch and a roof: Make sure the roof overhangs to protect the birds from rain.
  • Paint or stain: Use bird-safe paints or stains for a colorful and durable finish.

You can even build a whole birdhouse community in your garden!

Simple Wooden Boxes

Wooden boxes are versatile and can be used for storage, gifts, or even just as decorative pieces.

  • Start small: Begin with a small jewelry box or a trinket box.
  • Use a miter saw or table saw: These tools will help you make precise cuts for the box's sides and bottom.
  • Use woodworking glue and clamps: Secure the sides and bottom of the box.
  • Add a lid: Create a snug-fitting lid for the box.
  • Sand and finish: Choose a finish that complements your style.

You can customize your wooden boxes with hinges, latches, or even a decorative inlay.

Essential Woodworking Tools for Beginners

Before you start any project, you'll need some basic woodworking tools.

  • Measuring Tape and Ruler: Essential for accurate measurements.
  • Hand Saw: Used for cutting wood to length.
  • Hammer: For driving nails.
  • Screwdriver: For driving screws.
  • Wood Glue: For bonding pieces of wood together.
  • Clamps: For holding pieces of wood together while the glue dries.
  • Sandpaper: For smoothing wood surfaces.
  • Safety Glasses: To protect your eyes from wood chips and dust.
  • Hearing Protection: To protect your ears from loud noises.

As you become more comfortable with woodworking, you can gradually expand your tool collection. But for now, these basics will get you started on a wide range of projects.

Tips for New Woodworkers

Here are a few tips for making your woodworking journey smooth and enjoyable:

  • Start small and simple: Don't try to tackle a complex project right away. Choose something manageable and build your confidence.
  • Practice your skills: Practice cutting, sanding, and measuring on scrap wood before tackling your project.
  • Read instructions carefully: Before you start any project, make sure you understand the instructions.
  • Take your time: Woodworking is about patience and precision. Don't rush the process.
  • Don't be afraid to ask for help: If you get stuck, don't be afraid to ask for help from a friend or a woodworking expert.
  • Have fun: Woodworking is a rewarding hobby. Enjoy the process and the satisfaction of creating something with your own hands.

Remember, woodworking is a journey, not a race. Enjoy the learning process and be proud of your accomplishments. Happy woodworking!

Read more

Make These Easy Wood Projects with Basic Tools

,
Make These Easy Wood Projects with Basic Tools

These Easy Wood Projects with Basic Tools Will Have You Building in No Time

Hey there, fellow woodworkers (or aspiring woodworkers!). Are you itching to get your hands dirty and create something beautiful and functional from wood? Don't worry, you don't need a fancy workshop or a lifetime of experience to start. With a few basic tools and a sprinkle of enthusiasm, you can knock out some awesome wood projects that'll impress your friends and family. So grab your safety goggles, let's dive into some easy wood projects that'll have you feeling like a pro!

A Simple Wooden Cutting Board: The Gateway Project

This is the perfect starting point for your woodworking journey. It's a practical piece that you'll use all the time and it's super easy to make. Plus, you can personalize it with different wood types and finishes. Here's what you need:

  • A piece of hardwood like maple, cherry, or walnut (around 12" x 18" is a good size)
  • Wood glue
  • Sandpaper (various grits, from coarse to fine)
  • Wood finish (oil, wax, or polyurethane)
  • A saw (hand saw or circular saw)
  • Measuring tape
  • Pencil
  • Clamps

Building Your Cutting Board

1. **Measure and Cut:** Measure and cut your hardwood to the desired size. You can make a simple rectangular board or get fancy with rounded edges.

2. **Sand It Down:** Sand the surfaces of your board with different grit sandpaper to smooth out any imperfections. Start with a coarse grit and work your way up to a finer grit for a smooth finish.

3. **Apply Finish:** Choose your favorite wood finish and apply it according to the manufacturer's instructions. Multiple coats are usually recommended for a durable finish.

4. **Let It Dry:** Allow the finish to dry completely before using your cutting board. You'll be slicing and dicing in style in no time!

A Rustic Wooden Sign: Say It With Wood

Wooden signs are all the rage! And they're surprisingly simple to make. You can create a personalized sign for your home, garden, or even a special gift.

  • A piece of scrap wood (any type will work, but pine or cedar are good options)
  • Sandpaper
  • Pencil
  • Saw (hand saw or jigsaw)
  • Wood stain or paint (optional)
  • Stencil or lettering guide (optional)

Crafting Your Sign

1. **Sketch It Out:** Decide on your design and sketch it onto the wood with a pencil. If you're not a freehand artist, you can use stencils or lettering guides to create your design.

2. **Cut It Out:** Use a saw to cut out your design. If you're using a jigsaw, be careful and use a guide to keep your cuts straight.

3. **Sand It Smooth:** Sand the edges and surfaces of your sign for a polished look.

4. **Add Color:** If you want to add color, apply wood stain or paint to your sign. Let it dry completely.

A Cozy Wooden Coasters Set: Protect Your Furniture in Style

Stop those pesky water rings on your coffee table with a set of handcrafted coasters. They're a perfect project for using up scraps of wood, and they add a touch of warmth to any home. Here's what you'll need:

  • Scrap wood (around 4” x 4” squares)
  • Wood glue
  • Cork squares (slightly smaller than the wood squares)
  • Sandpaper
  • Wood finish (optional)
  • Saw (hand saw or circular saw)
  • Clamps

Putting Together Your Coasters

1. **Cut the Wood:** Cut your scrap wood into squares or rectangles of your desired size. Make sure they're all the same size for a consistent look.

2. **Add the Cork:** Attach a cork square to the bottom of each wood piece with wood glue. The cork will protect your furniture from scratches and create a nice grip. Clamp the cork and wood together until the glue dries.

3. **Sand and Finish (Optional):** Sand the top surfaces of the coasters to smooth them out. You can also add a wood finish like oil or wax for added protection.

A Functional Wooden Shelf: Add Storage and Charm

Spice up your home decor with a simple, yet elegant wooden shelf. You can use it for displaying your favorite books, plants, or trinkets.

  • Two pieces of wood for the shelf (approximately 12” x 12” each)
  • Two pieces of wood for the sides (approximately 10” x 4” each)
  • Wood glue
  • Wood screws
  • Sandpaper
  • Saw (hand saw or circular saw)
  • Drill
  • Clamps

Building Your Shelf

1. **Measure and Cut:** Measure and cut your wood according to your desired shelf size. Make sure all your pieces are cut to the correct dimensions.

2. **Assemble the Sides:** Attach the side pieces to the shelf pieces with wood glue and screws. Clamp the pieces together until the glue dries.

3. **Sand It Down:** Sand the surfaces and edges of your shelf to give it a smooth finish.

4. **Add a Finish:** Apply a wood finish like oil, wax, or polyurethane to protect and enhance the look of your shelf.

Tips for Successful Woodworking

Here are a few extra tips to make your woodworking journey smoother and more enjoyable:

  • Safety First: Always wear safety glasses and a dust mask when working with wood. Protect your hands with gloves too!
  • Start Small: Don't try to tackle complex projects right away. Start with simple ones and gradually work your way up in complexity.
  • Practice Makes Perfect: Practice your skills on scrap wood before working on your final project. It's better to mess up on a scrap piece than your masterpiece!
  • Don't Be Afraid to Ask for Help: There are tons of resources available online and at your local hardware store. Ask for help if you need it, and don't be afraid to experiment!

There you have it, friends! Four easy wood projects that you can tackle with basic tools. Remember, the most important thing is to have fun and enjoy the process of creating something beautiful with your own two hands. Happy woodworking!

Read more

Tuesday, November 12, 2024

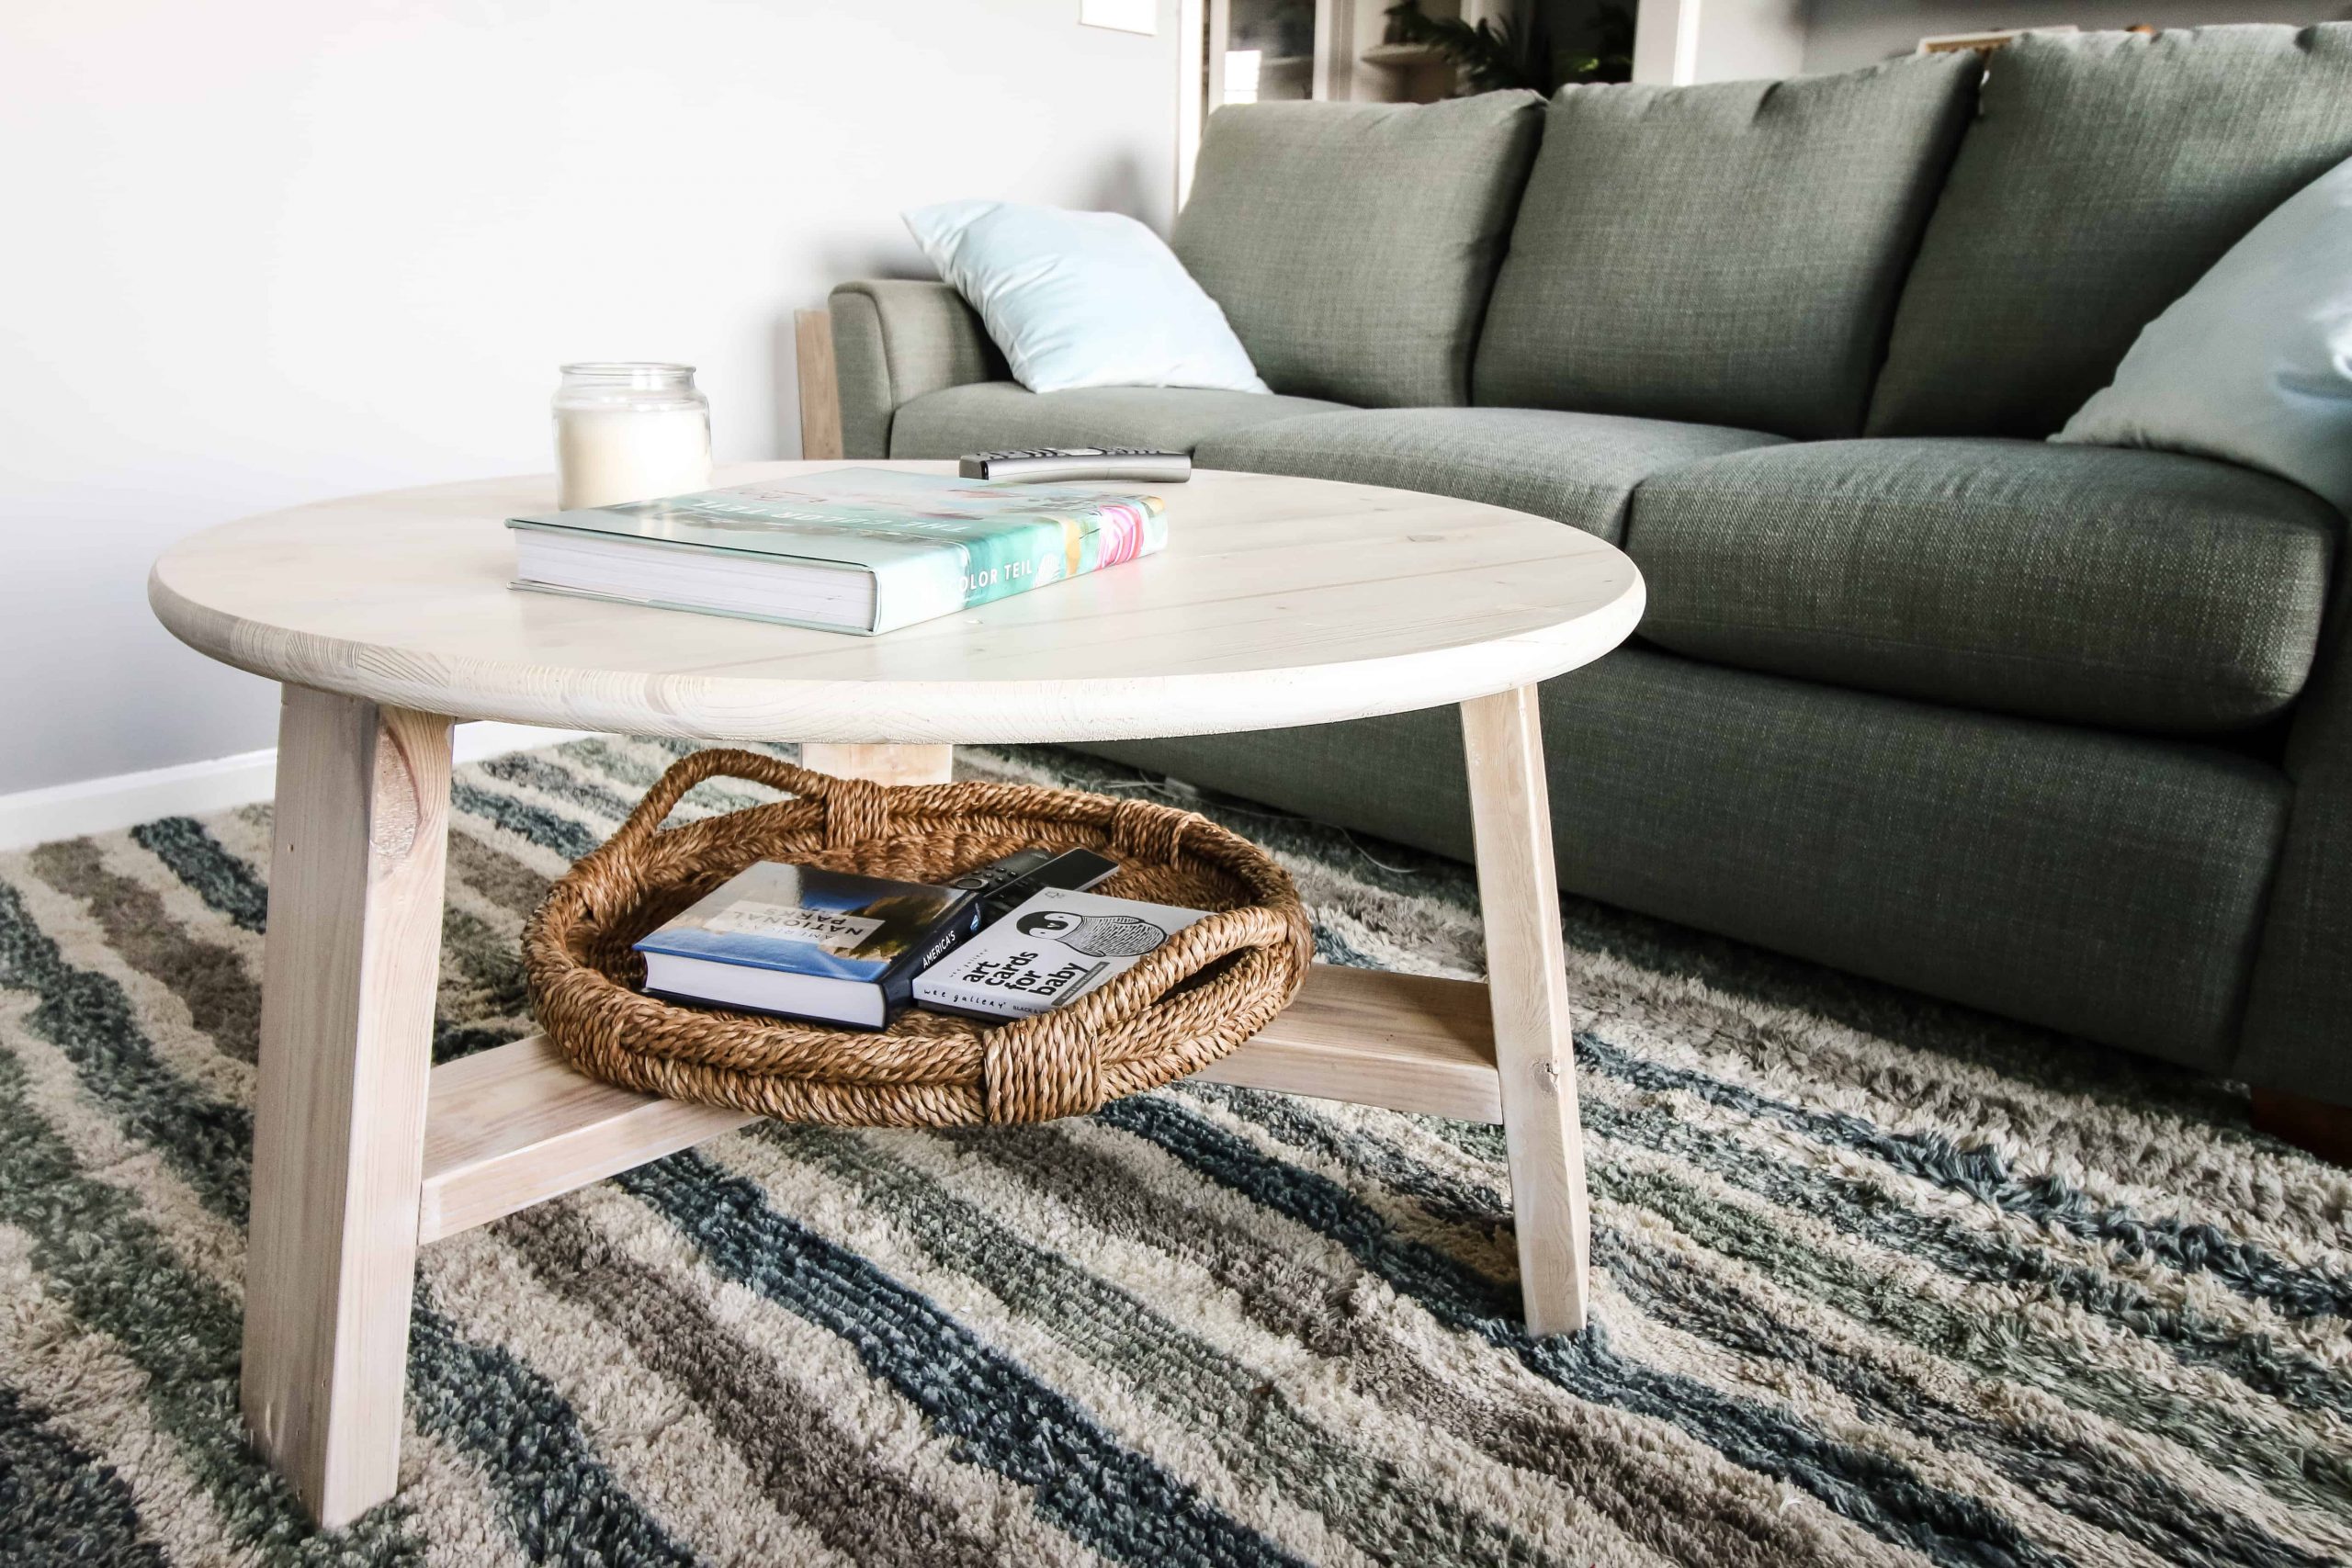
Easy DIY Coffee Table Build: Plans and PDF Download

,
Easy DIY Coffee Table Build: Plans and PDF Download

Easy DIY Coffee Table Build: Plans and PDF Download

Hey there, DIY enthusiasts! Are you looking to add a touch of personal style to your living room without breaking the bank? Building your own coffee table is a fantastic way to do just that, and it's way easier than you might think! I'm going to walk you through an easy-to-follow guide, complete with downloadable plans, so you can create a beautiful and functional coffee table that perfectly complements your space.

Choosing Your Style

Before we dive into the specifics, let's talk about the look you're going for. What kind of vibe are you aiming for? Do you want a rustic farmhouse feel, a sleek modern aesthetic, or something in between? Consider the existing furniture in your living room and choose a style that blends in seamlessly.

Wood Choices

The wood you choose plays a big role in the overall look of your coffee table. Here are a few popular options:

  • Pine: Affordable and easy to work with, pine is a great choice for beginners. It has a light color and a natural grain pattern.
  • Oak: Known for its durability and beautiful grain, oak is a more expensive option but offers a classic look.
  • Walnut: A luxurious and elegant choice, walnut has rich, dark tones and a stunning grain.
  • Reclaimed Wood: For a unique and environmentally friendly option, consider using reclaimed wood. This adds character and history to your coffee table.

Getting Started: Essential Supplies

Alright, let's gather the tools and materials you'll need. Don't worry, you don't need a massive workshop to pull this off. A basic set of tools is all you need.

Tools:

  • Miter Saw: For precise cuts of your wood.
  • Drill: For drilling pilot holes and attaching hardware.
  • Screwdriver: For securing screws.
  • Clamps: To hold your wood pieces together while you work.
  • Measuring Tape: To ensure accurate dimensions.
  • Level: For ensuring your table top is perfectly flat.
  • Safety Glasses: Protect your eyes from flying debris.
  • Ear Protection: Protect your hearing from loud noises.

Materials:

  • Wood: The type and amount will depend on the design of your coffee table.
  • Wood Glue: To bond your wood pieces together.
  • Screws: To secure the table legs and frame.
  • Finish (Optional): Paint, stain, or polyurethane to protect and enhance the look of your table.

Building the Frame

Now, let's build the foundation of your coffee table. Follow these steps to create a sturdy frame:

  1. Cut the Wood: Using your miter saw, carefully cut the wood pieces according to the measurements in your downloadable plans. Remember to double-check your cuts to ensure accuracy.
  2. Assemble the Frame: Join the wood pieces together using wood glue and screws. Secure them with clamps to allow the glue to dry properly. Use a level to ensure all sides are even.
  3. Attach the Legs: Depending on the design of your table, the legs can be attached to the frame using either screws or a mortise and tenon joint.

Building the Tabletop

The tabletop is the crowning glory of your coffee table. Let's build a masterpiece:

  1. Cut the Top: Cut your tabletop pieces according to the dimensions provided in your plans. If you're using multiple pieces, be sure to join them together with glue and screws.
  2. Sand the Top: Before attaching the tabletop, sand all the edges and surfaces smooth to ensure a beautiful finish.
  3. Attach the Top: Once the frame is complete, secure the tabletop to the frame. Use a level to ensure everything is perfectly aligned.

Finishing Touches

Almost there! Now it's time to add the final flourishes and bring your coffee table to life:

  • Sanding: Sand the entire table to remove any rough spots or imperfections.
  • Finishing: This is where you can really personalize your table. Choose a finish that complements your style. You can paint it, stain it, or apply a clear polyurethane to protect the wood.
  • Finishing Touches (Optional): You can add some extra flair to your table with decorative hardware like handles, hinges, or even some personalized etching.

Downloadable Plans

Ready to get started? Download your free DIY coffee table plans below. I've included detailed instructions and diagrams to help you create a beautiful and functional coffee table with ease:

[Insert Link to Downloadable Plans]

Tips and Tricks

Here are a few extra tips to help you along the way:

  • Measure Twice, Cut Once: Accuracy is key! Double-check your measurements before making any cuts to ensure everything fits perfectly.
  • Use a Level: A level is your best friend when building a coffee table. It helps ensure that everything is perfectly straight and balanced.
  • Take Your Time: Building a coffee table is a rewarding process. Don't rush it. Take your time and enjoy the process.

Conclusion

And there you have it! You're now equipped with the knowledge and resources to build a stunning coffee table that you can be proud of. Remember, it's okay to make mistakes. It's all part of the learning process. Have fun with it, and enjoy the satisfaction of creating something beautiful with your own hands.

Feel free to share your creations with me! I'd love to see what you come up with. Happy building!

Read more

How to Make a Firewood Rack from Pallets for Cozy Winter Nights

,
How to Make a Firewood Rack from Pallets for Cozy Winter Nights

How to Make a Firewood Rack from Pallets for Cozy Winter Nights

Hey there, fellow fireside enthusiasts! As the leaves start to fall and the air gets crisp, there's nothing quite as cozy as settling in for the evening with a crackling fire. But before you can fully embrace those winter nights, you'll need a reliable spot to store your firewood. Enter the humble pallet: a DIYer's dream material for creating a rustic and functional firewood rack!

Building a firewood rack from pallets is a breeze, even if you're not a seasoned carpenter. With just a few basic tools and some creativity, you can craft a sturdy and stylish rack to keep your firewood organized and off the ground, ready for those chilly evenings.

Gathering Your Supplies

First things first, let's gather our tools and materials. You'll need:

  • One or two pallets: Look for sturdy pallets with minimal damage. If you're using a single pallet, it should be a standard size. You can always ask for pallets at local businesses. They often give them away for free!
  • Safety Glasses: Always protect your eyes when working with wood.
  • Heavy-duty gloves: These will protect your hands from splinters and rough wood.
  • Circular saw or hand saw: For cutting the pallet to your desired size.
  • Hammer and nails or screws: For assembling the rack.
  • Measuring tape and pencil: For marking cuts and ensuring accurate dimensions.
  • Sandpaper: For smoothing out any rough edges and creating a more polished finish.
  • Optional: Stain, paint, or sealant: To personalize your rack and add a touch of your style. (Think rustic wood tones or bright pops of color!)

Preparing the Pallet

Alright, let's get to work! The first step is to prepare your pallet. This involves cleaning, disassembling, and making any necessary cuts:

Cleaning the Pallet

Give your pallet a good cleaning. Use a wire brush to remove any loose debris and dust. If your pallet has been sitting outside, a hose-down with water might be necessary.

Disassembling the Pallet (Optional)

Depending on the design of your rack, you might need to disassemble the pallet. This is often easier than trying to work with the entire pallet intact. Use a hammer and a nail puller or crowbar to gently remove the nails.

Cutting the Pallet (Optional)

If your pallet is too large for your desired rack size, you'll need to cut it down. Use your measuring tape and pencil to mark the desired cutting lines, then carefully use your saw to make the cuts. It's a good idea to have a sturdy work surface for this part.

Building the Firewood Rack

Now it's time to assemble your firewood rack! Let's get creative. Here are a few simple designs to inspire you:

The Simple Lean-To Rack

This is the easiest and most basic firewood rack design. It's perfect for smaller spaces and requires minimal tools.

  1. Select the two longest boards of the pallet as the base of your rack.
  2. Place the boards parallel to each other, leaving a space between them for your firewood.
  3. Lean shorter boards against the base boards, forming the sides of the rack. You can create a "V" shape by placing two short boards on the top of the base boards.
  4. Secure the structure by using nails or screws to attach the sides to the base boards.

The Stackable Rack

If you have a lot of firewood or want a taller rack, consider a stackable design:

  1. Cut the pallet into multiple sections of equal size. These will become the shelves of your rack.
  2. Attach the shelves to each other using nails or screws, leaving space between them to create a sturdy, stackable structure. You can add cross-braces for added stability.

The Wall-Mounted Rack

This is a space-saving option that's perfect for smaller areas. Here's how:

  1. Cut the pallet into sections that fit the size of your wall.
  2. Attach sturdy brackets to the wall, spaced to accommodate the width of the pallet sections.
  3. Secure the pallet sections to the brackets.

Finishing Touches

Now that your firewood rack is assembled, it's time to add the final touches! Sanding, staining, painting, or sealing your rack can give it a polished look and protect the wood.

  1. Sand all surfaces with sandpaper to remove any rough edges or splinters.
  2. If desired, stain or paint the rack using a brush or roller. Let the finish dry completely before using the rack.
  3. Apply a sealant to protect the wood from the elements and prevent warping.

Tips for Using Your Firewood Rack

To make your firewood rack even more functional, consider these tips:

  • Place the rack in a dry location. Firewood should be stored in a sheltered spot, ideally under a roof or tarp, to keep it dry.
  • Stack the wood correctly. A good stacking technique will prevent your rack from tipping over. Space the wood evenly to allow for air circulation.
  • Organize your firewood by size. Keep the smaller pieces on the bottom of the rack for easy access when starting a fire.
  • Consider adding a cover. A simple cover will keep the firewood dry and clean, even during the harshest winter weather.

Enjoy Your Firewood Rack

Congratulations! You've now created a practical and stylish firewood rack from a recycled pallet. Your winter nights are about to become much cozier! Remember, your rack can be as simple or elaborate as you like. Let your creativity flow and have fun with the process!

And when you're relaxing by the fire, remember the satisfaction of knowing you built a cozy nook all on your own.

Read more

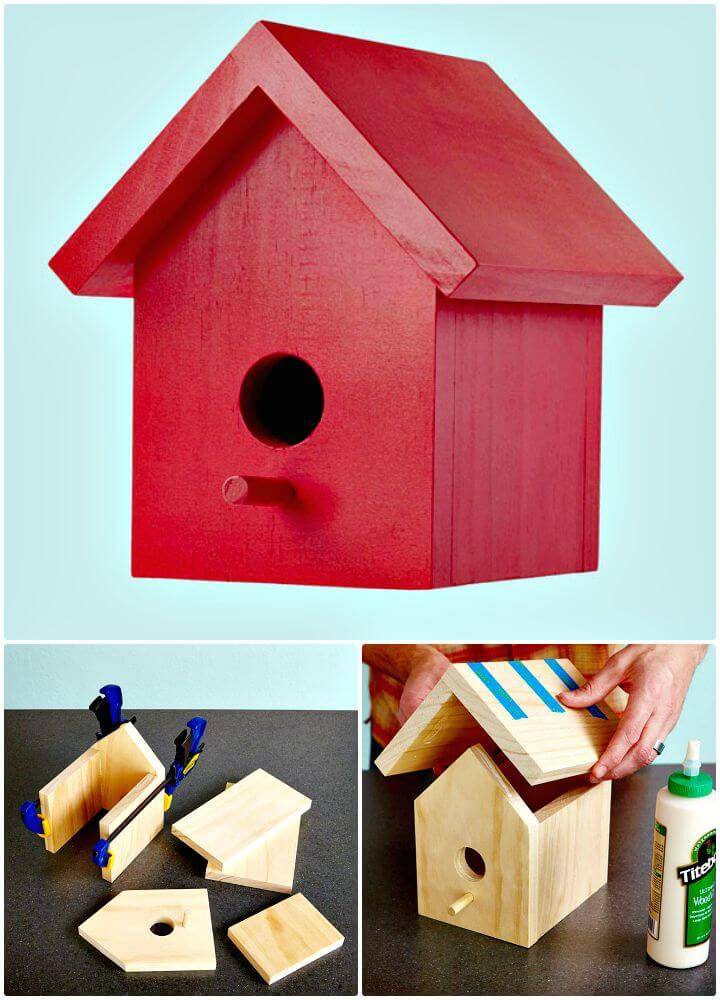
How to Make a Simple Wooden Birdhouse with Minimal Tools

,
How to Make a Simple Wooden Birdhouse with Minimal Tools

Crafting a Simple Wooden Birdhouse with Minimal Tools

Birdhouses provide a safe and comfortable haven for birds, enhancing the natural beauty of your backyard while attracting these feathered friends. Constructing your own birdhouse is a rewarding project that fosters a connection with nature and offers a sense of accomplishment. This guide provides step-by-step instructions for crafting a simple birdhouse using minimal tools, making it accessible even for beginners.

Materials Needed

Before embarking on this project, gather the following materials:

  • Wood: 1x6 inch (or similar) pine board, approximately 12 inches long. You may choose to use cedar for its natural insect-repelling properties and durability.
  • Screws: 1 1/4-inch wood screws (approximately 10-12)
  • Drill or Screwdriver: A cordless drill with a Phillips head bit is recommended for ease of use.
  • Measuring Tape: Essential for accurate measurements.
  • Pencil: For marking the wood.
  • Saw: A handsaw, jigsaw, or circular saw.
  • Sandpaper: Various grits (80, 120, and 220) for smoothing the wood.
  • Optional: Stain or paint for a decorative finish, roofing shingles for a weatherproof roof, and a birdhouse mounting bracket.

Construction Steps

Follow these steps to build your simple birdhouse:

1. Cut the Wood

  • Cut the wood into the following pieces:
    • Base: 6 inches wide x 12 inches long
    • Back: 6 inches wide x 6 inches long
    • Sides: 6 inches wide x 6 inches long (2 pieces)
    • Front: 6 inches wide x 6 inches long
    • Roof (2 pieces): 7 inches wide x 6 inches long

2. Create the Entrance Hole

On the front piece of wood, mark the location for the entrance hole. Center it horizontally and position it about 2 inches down from the top. The hole size will vary depending on the bird species you wish to attract. For common backyard birds like chickadees and wrens, a 1 1/2-inch diameter hole is suitable.

Using a drill bit or a coping saw, carefully create the entrance hole.

3. Assemble the Birdhouse

  • Attach the Sides: Align the sides to the back piece, ensuring they form a 90-degree angle. Secure them with wood screws at the top and bottom corners.
  • Attach the Front: Position the front piece to the sides and back, again ensuring a 90-degree angle. Attach it with screws at the top and bottom corners.
  • Add the Base: Attach the base to the bottom of the birdhouse with screws.

4. Construct the Roof

  • Create the Roof Shape: Cut a gentle slope on the top edge of each roof piece to form an A-frame shape. You can make the angle as steep or shallow as you prefer.
  • Attach the Roof: Position the roof pieces on top of the birdhouse, aligning them with the sides and back. Secure them with screws.

5. Sand and Finish (Optional)

Sand all surfaces of the birdhouse with sandpaper, starting with a coarser grit (80) and progressively moving to finer grits (120, 220) for a smoother finish. This removes any rough edges and creates a pleasant look.

To enhance the birdhouse's appearance and provide protection, you can apply a stain or paint. Choose bird-safe options that are non-toxic and water-based. Let the finish dry completely before placing the birdhouse.

6. Install the Birdhouse

Choose a location for your birdhouse that provides shelter from the elements and is out of reach of predators. You can mount it to a tree, a fence post, or a wall using a birdhouse mounting bracket.

Ensure the birdhouse is securely mounted. If you are attaching it to a tree, make sure to use a mounting bracket that minimizes damage to the tree bark.

Tips for Attracting Birds

To increase the chances of birds choosing your birdhouse as a home, consider these tips:

  • Location: Place the birdhouse in a spot that offers protection from wind and rain but still receives adequate sunlight. Avoid areas with heavy foot traffic or noisy machinery.
  • Height: Aim for a height of 5-10 feet above the ground. This discourages predators and provides a good view for birds.
  • Orientation: Position the entrance hole away from prevailing winds and direct sunlight. This helps keep the inside of the birdhouse comfortable.
  • Cleanliness: Regularly clean the birdhouse to remove debris and parasites. This ensures a healthy and hygienic environment for nesting birds.
  • Water Source: Birds need a reliable source of water. Provide a bird bath or shallow container filled with fresh water to attract and keep birds in your yard.

Conclusion

Building a simple wooden birdhouse is a rewarding experience that brings you closer to nature. With the right tools and materials, even beginners can create a charming and functional haven for birds. Enjoy the process, pay attention to the details, and watch as feathered friends discover your creation.

Read more

Creative Squirrel Box Designs with Free Plans

,
Creative Squirrel Box Designs with Free Plans

Creative Squirrel Box Designs with Free Plans

Squirrels are charming creatures, but they can also be quite destructive. If you're tired of squirrels raiding your bird feeders or digging in your flower beds, a squirrel box might be the perfect solution. A squirrel box is essentially a small house or shelter that provides squirrels with a safe and comfortable place to live. This can help to deter them from causing damage to your property.

But don't just settle for a boring, plain box! With a little creativity, you can build a squirrel box that's both functional and aesthetically pleasing. Here are some ideas for creative squirrel box designs with free plans:

Classic Squirrel Box Designs

If you're looking for a traditional squirrel box design, there are plenty of free plans available online. These plans typically feature a simple, rectangular box with a roof, a small entrance hole, and an internal platform. This design is easy to build and provides squirrels with a basic shelter.

Classic Rectangular Box

The classic rectangular box is a simple and functional option. It typically has a flat roof with a small overhang and a single entrance hole located on one side. This design is easy to build and provides squirrels with a basic shelter from the elements.

You can enhance the classic design by adding features like:

  • A small platform inside the box for squirrels to rest on
  • A metal mesh screen over the entrance hole to deter predators
  • A roof overhang to protect the entrance from rain

A-Frame Squirrel Box

For a more unique design, consider building an A-frame squirrel box. This design is visually appealing and offers additional space for squirrels to move around inside. It has a triangular roof with a wide base and a small entrance hole at the base of the roof.

Creative Squirrel Box Designs

If you want to create a more unique and personalized squirrel box, here are some creative ideas to consider:

Upcycled Squirrel Box

Upcycle old items like wooden crates, birdhouses, or even a small wooden table to create a unique squirrel box. This is a great way to repurpose old materials and add a touch of character to your yard.

Here are some ideas for upcycled squirrel box designs:

  • Use a wooden crate with a hinged lid to create a squirrel box with a hidden entrance.
  • Attach a birdhouse to a small platform and create a cozy squirrel home.
  • Turn a small wooden table upside down and cut out a circular entrance in the center.

Birdhouse-Style Squirrel Box

Give a nod to the bird world by designing a squirrel box that resembles a birdhouse. This can be a fun and whimsical addition to your yard. You can use traditional birdhouse materials like cedar or redwood and add decorative elements like shingles or a small porch.

Natural Squirrel Box

Take inspiration from nature and build a squirrel box that blends seamlessly into your garden. Use natural materials like branches, logs, and rocks to create a rustic and organic design. You can even carve out the entrance hole in a large log for an authentic feel.

Building Your Squirrel Box

Once you've chosen a design, you'll need to gather your materials and tools. Here are some essential items you'll need:

  • Wood: Cedar, redwood, or pine are good choices for squirrel boxes as they are rot-resistant and durable.
  • Screws or nails: Use galvanized screws or nails to ensure they don't rust.
  • Saw: A handsaw or circular saw will be needed to cut the wood.
  • Drill: A drill with different drill bits will be needed for pilot holes and drilling the entrance hole.
  • Hammer: A hammer will be needed for driving nails.
  • Measuring tape: A measuring tape will be needed for accurate measurements.
  • Pencil: A pencil will be needed for marking the wood.
  • Safety Glasses: Protect your eyes while working with power tools.

Free Squirrel Box Plans

There are countless free squirrel box plans available online. Here are some websites to get you started:

  • Ana White: A popular DIY website with free plans for various projects, including squirrel boxes.
  • Birdhouse Building Plans: While primarily focused on birdhouses, this website offers some free squirrel box plans.
  • Pinterest: Pinterest is a great source for inspiration and free plans for squirrel boxes and other DIY projects.

Placement and Maintenance

Once you've built your squirrel box, it's important to place it in a suitable location and maintain it regularly.

Placement

  • Height: Mount the squirrel box at least 6 feet off the ground to protect it from predators and make it accessible to squirrels.
  • Location: Choose a location that provides shade and is close to a source of food and water. A tree or post is an ideal location.
  • Accessibility: Ensure the squirrel box is accessible to squirrels but difficult for other animals to reach. Consider using a metal mesh screen over the entrance hole to deter predators.

Maintenance

  • Clean Regularly: Clean the squirrel box out at least once a year to remove any debris, parasites, or droppings.
  • Inspect for Damage: Regularly inspect the squirrel box for any signs of damage or rot. Repair any damage immediately to prevent the box from becoming unsafe for squirrels.
  • Replace as Needed: The lifespan of a squirrel box depends on the materials used and the weather conditions. If the squirrel box starts to show signs of wear and tear, it's time to replace it.

Building a squirrel box is a fun and rewarding project. It's a great way to provide a safe and comfortable home for these playful creatures while deterring them from causing damage to your property. So get creative, choose a design that fits your style, and enjoy the satisfaction of building a unique and functional squirrel box!

Read more
 

Made by Self Copyright © 2016 -- Powered by Blogger